Pages |
Home |
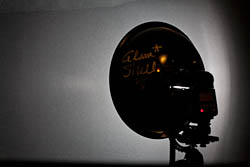
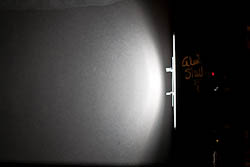
| The "Glam Shell" Beauty Dish. | 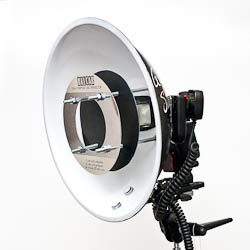 |
Once we can get past the rather cute and unmanly name, a beauty dish has a very real purpose as a modifier for the strobist. In the real world a beauty dish has the directional control of a spot light, but possesses some of the fall off and softness of a soft box. Design considerations. |
|
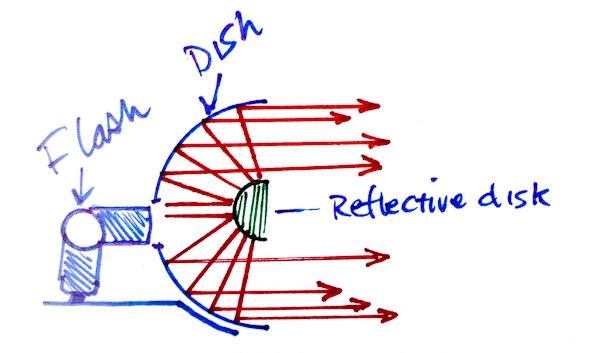
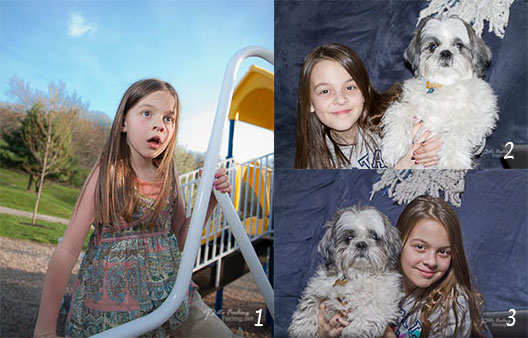
In some cases, and depending on the center modifier, it behaves more like a ring light when used in close proximity of the subject, and axis of the camera. Because of it's quick fall off, both the size of the dish and it's light source will have limited use relevant to the size of the subject being photographed. Hence, a single speedlight would benefit from a smaller dish for head and shoulders, while a studio strobe (or multiple speedlights rigged together) would benefit in larger dish's for full body and groups. Second, is the size of the center disk relevant to the diameter of the dish. The disk must be wide enough to cover or block the light source, without cutting into and also blocking the light that reflects out from the dish. Light must be able to reflect from the disk back onto the dish's surface. A convex surface or the use of a covex mirror helps. Third. The depth of the dish relavent to it's diameter will determine the angle of the projected light. Deeper dishes will yield a deeper beam, while shallow dishes will have a wider throw. Fourth. The light source will greatly determine the overall effective size of the dish, and when using speedlights, you will meet the same challenges when it comes to having enough light to balance with outdoor shoots in daylight. In such cases, if you wish to use a dish 16 inches or larger, it would require the use of two or more speedlights mounted through the shoot hole to garner enough juice to be effective. Fifth. The shape and type of light source will have some effect as well. Obviously a bare bulb flash will produce a more uniform, radial light than a speedlight thyrister buried into a rectangular recess behind a fresnel lens. None-the-less, the beauty dish greatly improves the results of speedlights when having to point them directly at your subject. Usage vs... vs. Bare Flash. Using the example above: With exception to needing fill to balance with bright sun (#1), I only use speedlights as bounce (#3), never pointing them directly at the subject (#2). Doing so creates issues with red eye, and blown highlights on cheekbones, and an unflattering look. Much of the pleasing natural light in the real world is mostly diffuse, bounced or reflected from objects that surrounds us. Using a flash as bounce creates the same effect. However, in cases where the flash is the only light source, and you have no choice but to shoot it directly, the beauty dish offers an alternative. vs. Bounces Cards. Using bounce cards have limited use, and force the need to angle the flash in order to get the card to face the subject. This in turn exposes the subject to a portion of the direct flash and defeats the purpose. Second, the farther the source is from the reflected surface, the softer the light. A bounce card up against the flash tube does not benefit from this. vs. Umbrellas. Umbrellas (when used as reflective - not shoot through) and beauty dishes are very similiar in application. With the beauty dish having it's light source more centered than an strobe that is mounted offset in a bracket and facing an umbrella. Beauty dishes tend to be heavier, and tend to resist being blown over in the wind. Umbrellas, while more fragile, are more portable. Umbrellas, especially semi-translucent shoot throughs tend to absorbe and encounter light loss. Construction.
Most DIY dishes basically consist of using a large metal mixing bowl, cutting out a hole in the center for the light source, and providing a means to affix a disk in the center to block light from hitting the subject directly. Some of the simple DIY designs use a cardboard disk that is floated over the center via zip ties from bowls edge. Which is fine for cooler speedlights and a hazard for any source that uses hot modeling lights.
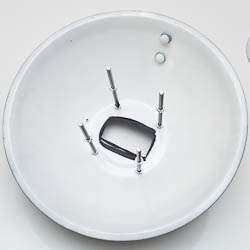
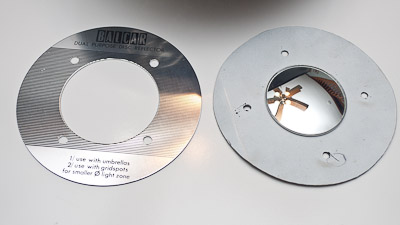
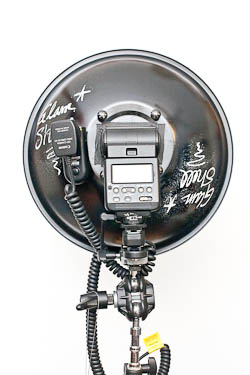
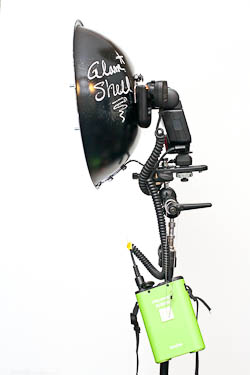
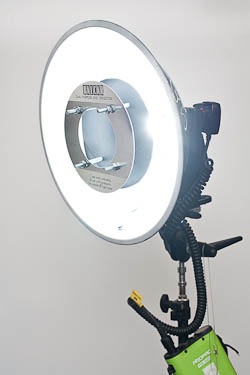
Commercial products use a preformed wire cage or bent rod to hold the disk. In my example I used four, 5 inch carriage bolts and nuts to allow adding different sized disks and other modifiers, including adjusting the depth of the disk within the dish. This allows for fine tuning to get the optimal effect a particular design provides. In addition, I've added a 3" convex spot mirror to help reflect and redirect the light from the flash into the dishes surface. You will also note my inclusion of a Balcar disk which has a 3" hole in it's center which I intend to use with grids and other materials that will allow some of the center light through for different effects.
While my dish was painted white, I could have chosen to keep it the natural silver of the stainless steel it's made of. However, I recommend that you scratch up the surface using steel wool first, to prevent glare and hot spots that will transfer onto your subject.
While on the subject of fit and finish, especially when used with clients, it's bodes well if you spend the extra effort to ensure a clean and professional look of your DIY project. That means deburing and grinding down rough edges. Using new fasteners, and learning the proper application of sanding and painting, (I say this despite that mine is already showing signs of abuse from use. - A nice bag or canvas cover is on the list).
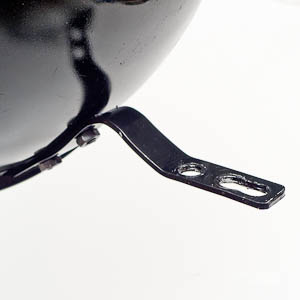
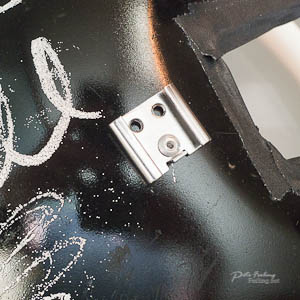
Two other unique features of my dish included the use of a single piece of flat stock, preshaped to hold the dish at the bottom, while allowing for different mounting schemes, (I use a Manfrotto 155 camera bracket). Less material means less weight and more access for different flash guns. A simple design means a professional product.The second feature is the application of a dummy shoe mount right on the dish. I like to use radio triggers via TTL hot shoe extension cords on all my flashes for three reasons: One, it allows me to place triggers in sight of the camera when the flash is not, 2) Should the trigger fail on the job, I can simply swap in another without disturbing the flash, or 3) Connect the camera directly to the flash if so needed. Application. The best way to understand the application of the beauty dish is to compare it to the two other forms of portable lighting: projection and diffuse. Projection: Speedlights and spotlights, with their fresnel lenses, fall under the form of projected light, and tend to have sharp contrast between a lighted surface and shadows. Surfaces that are lit directly by projection tend to be very bright -almost blown, while areas not in direct view of the light tend to be heavily or darkly shadowed. This creates a hard edged look. Projected light doesn't have much in terms of spill. Parts of the scene are either lit, or not, and it's easy to control unwanted light with flags and doors.
Diffuse: Soft boxes, CFL's and reflected light are diffuse, as the light bounces off of several surfaces and scatters in multiple directions. This tends to light everything in the room and shadows are very soft and with greater transition. Diffuse light also tends to wrap around objects and can reveal shape and depth. Spill can be an issue with diffuse light and controlling it can be tricky in small spaces.
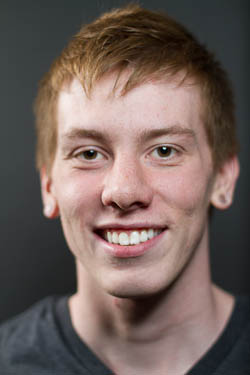
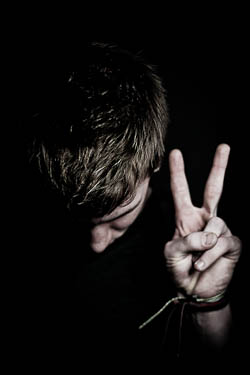
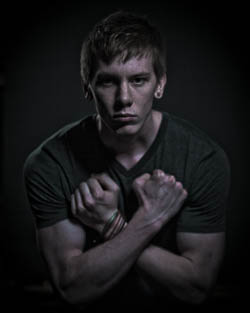
The Beauty dish is a combination of both projection and diffuse. It projects like a spotlight, but has a fall off that is both diffuse and very short in range. Lit surfaces are even in tone, but lack the unwanted blown highlights on cheekbones and noses. Shadows are well defined, but softer than a projected light with some fall of on the edges. You're subject could be mere feet from a wall, and yet the light would not reach it or the spill be too faint to be picked up in the shot.
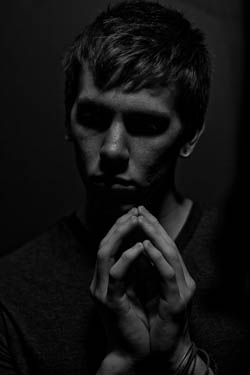
Like a soft box, the intensity of the light on your subject can be controlled simply by moving the light closer to, or farther away from the subject. A mere foot or two will produce a dramatic change. This also includes small changes in axis relative to the camera to either fully light the face, or add shadow for more depth.
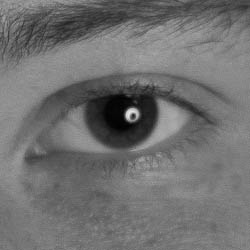
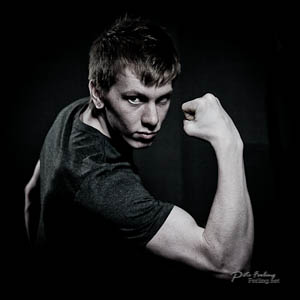
Catchlights. While it's said that the eyes are windows to the soul. They can also tell you what kinds of lighting was used to make the shot. A beauty dish will leave that nice, round, and pleasing catch light.
The beauty dish opens up all kinds of creative use. Allowing for the use of wide apertures without opening up the background much, and for creating the same dramatic edge as with projection, but still having some fill and wrap to create a sense of depth. One other cosideration is that a beauty dish, if properly built, is much stronger than a softbox, and more resistant to being blown over than an umbrella. Conclusion. For my own needs, I wanted a small dish that could be used effectively for portraiture in small, confined spaces. The small size of this dish, at 13 inches, easy accomodates adverage flashes with guide numbers 38 and higher, and is ultimately portable. Finally, you don't need to follow my example. You can purchase or construct dishes that will resolve light more like a spot, or add modifiers or cloth covers (socks) that will scatter the light more like softboxes. It comes down to a matter of taste. I wanted something smaller than the smallest standard size of 16 inches, and I think I've succeeded. -Keep Shooting.
|
|


