Pages |
Home |
Live Stage and Event Photography (and what I've learned): |
|
| Chapters Introduction Your limitations Gear limitations The Basics Aperture Shutter Speed ISO Value (light sensitivity) Initial Camera Settings Technique Body Language Conclusion Galleries |
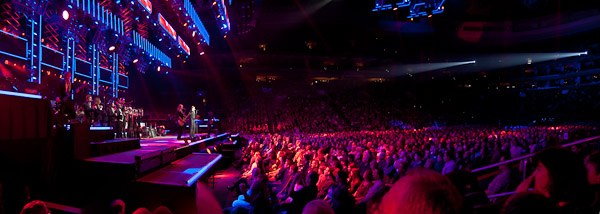
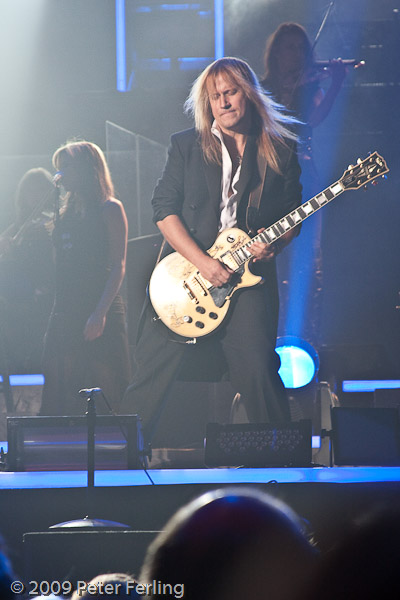
Thanks goes to my friend Vitalij Kuprij for inviting me to shoot a live concert with the Trans-Siberian Orchestra. I also like to thank all those wonderfully talented artist, and TSO for their outstanding performance and kindness. |
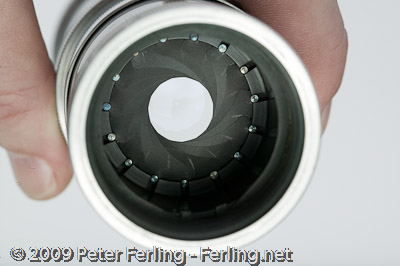
So you want to learn about shooting event and stage photography, and I've bet that you've already been to the show with your new pocket shooter, (you know the one that takes excellent shots on the beach), and found only disappointment. Well then you came to the right place... (actually, lets hold on that one until the end). Before we begin, there are few caveats: First, is that no particular camera will make you a good photographer. Cameras are essentially dumb boxes and you are the brains behind it. Second. You need to have a proper mind set and understanding of the limitations of you, your gear and venue. Don't expect much from a cell phone or a point and shoot set to automatic. In fact, don't expect much even from a $7000 camera set to automatic either. Third. If you're reading this article in hopes to improve your results with a cell phone, then I have no answer for you here. However, you will gain an understanding as to what it takes, and if you have an entry level DSLR, or a decent pocket shooter with manual controls then there is some hope. Lastly, I don't expect anyone to read this article to actually "get it" without first having some experience in shooting. I'm sure that some will disagree with me herein, and that's fine. After twenty-five years behind a lens I'm pretty much set in my methods which cannot be unlearned. Fair enough? Good. Ok, let's break those limitations down further: Understand that if you've come to the venue as a spectator with the mind set of being entertained, you will never be ready to take the perfect shot. You might see one and by the time you have processed the thought to raise the gear, the lead guitarist moved on, or the lights went down, etc. When I come to the venue I am a photographer. The camera is always on the ready. I am not looking to be entertained, I am looking for the entertaining shot. The camera rarely goes lower than my chin. I am aware of the light show, but only with regards to availability. I am constantly adjusting the camera, both the iso and shutter speed. When the moment hits, I raise frame and fire a burst of 3 or more. Two are blurry, but one hits the target. By nights end I will have easily shot a few hundred images. My wife and those sitting next to me would rather that I not be the photographer. The "click, click, click..." sound can be rather annoying. Granted, during quiet moments I usually take my time and get one shot and hold. Before I wear out my welcome, I will move to limit my presence, and increase my success. However, those irritations will be quickly forgotten in light of captured moments that will last a lifetime. Features and settings. Cameras set to automatic will measure the amount of light that hits their sensors and will make adjustments in order to obtain proper exposure only, and at the risk of blurry and out-of-focus shots. Bright yes, but blurry due to too slow a shutter speed. (Ideally you want to keep the fastest shutter speed possible to freeze motion, and adjust your ISO/aperture to control the light levels). Even when there is plenty of light, you risk many missed opportunity due to the precious seconds it takes for the camera to decide what settings are in need of adjustment before releasing the shutter. Like a fine wine, the "F" word flows freely from your mouth. Point and Shoot (PS) camera's. If you happen to have a fixed lens pocket camera, all is not entirely lost. Depending on the feature set and whether or not your camara has manual controls, the same rules here still apply, and you can garner professional or improved results. Second, a lot depends on the lens, and how accurate the focusing is. If your stuck with auto-focus, you'll be at the mercy of the onboard computer actually hitting your intended target. Which is why it's preferable to have an DSLR. You simply have full manual control and physical access to the controls to make changes quickly. You won't have to wait for a slow autofocus system either, if you have good eye site, you'll be able focus much quicker. The drawback is the added bulk of extra gear, the need to bring extra lenses and bringing attention to yourself (which may or may not be an issue). "No cameras allowed!" That pretty much sums it up. If your bringing a large SLR, at this point you can change your mind about being the photographer and switch to spectator mode. Realizing that you parked your car a good distance away, and make a mad dash to lock up your gear. So having a decent point and shoot in your pocket as backup (I carry a canon G5, and recently had the opporunity to use it), as a point and shoot would be better than nothing. It's way too dark, lights are flashing everywhere, and I have all these people standing up and waving their arms in front of me. These are obvious challenges to a cameras sensor in trying to find an optimal setting for taking the shot. Therefore, you need to learn how to set and use your camera in manual mode. Have I lost you yet? No. Ok, maybe this next section will do the trick... There are three key settings in determining the outcome of a properly exposed shot, and they are: This setting controls the opening size of the lenses iris. The larger the opening, the more light you let in. What is confusing to newbies about the aperture is that the scale or numbering system is backwards. That is, the physically widest opening is noted as the smallest numerical setting. So at "F2" the aperture is wide open, while at "f16" the aperture is almost closed.
Put it another way. When you enter a dark room the iris or pupil of you eye opens wide to let in more light, but turn on the lights and it closes down. To see this, go into the bathroom, face the mirror and while looking at your pupils, flip the light switch and see what happens. Many of the better compact cameras, and pro lenses for DSLRs will have an aperture the opens to at a value of f2 to 2.8. Many consumer lenses will only go to f3.5 Which is fine as I have many good shots that worked at f4 and f5.6 with good stage lighting. However, at f5.6 I might have to use an ISO value of 1200 or more. Sometimes 1600 and we start getting into a noisy image, not a bad thing, but something we'd like to avoid (we'll discuss ISO in a bit). Depth of Field. The other feature the aperture controls is known as the depth of field or DOF for short. This refers to the zone where things are in focus. Opening up the aperture decreases or creates a shallow DOF, while closing down the aperture will create a deeper one. Portraits are typically shot at f2.8 to f4 as the shallow DOF blurs the background and helps to isolate the subject in focus. While landscapes are typically shot at f8 or higher to ensure that everything in the shot is in focus.
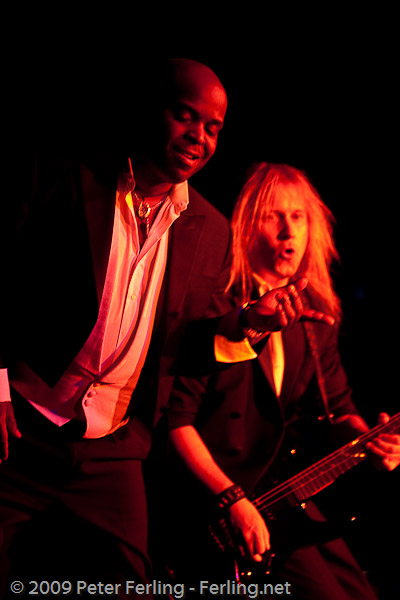
In the above example it was so dark with the single orange spot that f2 was used and so Jay Pierce's face is in focus, but Chris Caffery, not more than two feet behind him is blurry.
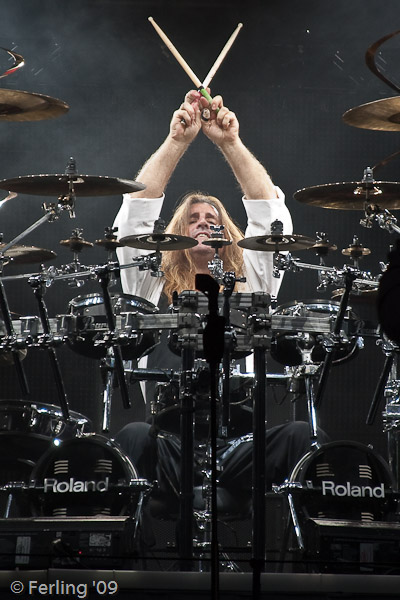
The above example with Jeff Plate crossing sticks was done at f5.6, so both he and his kit are in the zone of focus., (and note that I was using the center AF point and thus focused on the kit and not him directly, yet he is still in focus). While the aperture controls the amount of light that hits the sensor, the shutter speed controls the duration of the light. What matters with shutter speed is being able to freeze motion. Fast objects like hands running across strings will require fast shutter speeds, while stationary or slow objects such as a motionless singer behind the mic can use slower shutter speeds. In regards to indoor or stage lighting, you want both a wide aperture to let in ample light, and a fast shutter speed to freeze motion. Camera shake and Image Stabilization. There is also another factor that contributes to blurry images and that is you, in the form of camera shake resulting from unsteady hands. To counter this, some cameras and lenses are equipped with anti-shake features, known as image stabilization or "IS" for short. Usually it's a micro motor or gyro that locks onto an bright object in the scene and physically moves the glass fractions of an inch to compensate and in a sense, stay locked onto the target for that critical brief moment when the shutter is released.
In the example above JLM went into this pose. Had he moved, and with 1/40s shutter, he would have been blurry. However, at 1/40s, the act of pressing down on the shutter would have introduced motion and the shot would have blurred. Image stabilization works. However, image stabilization will not compensate for a fast moving item in the scene. It will only subtract, to a certain degree, any additional movement you add into the equation. Also, in order to be effective, there must be enough light to allow the sensor to see something that it needs to lock on to in the first place, otherwise it fails and does nothing. What's the chances of that happening in a dark concert hall? Before image stabilization, there was a rule of thumb that the slowest shutter speed one can use without introducing hand shake is equal to the numerical length of the lens. So, for a 50mm lens, you should go no lower than 1/50th of a second and for a 100mm, you should not go lower than 1/100th or 1/125th. However, if you are using a crop or small sensor camera, then you also have to factor in the additional length given by that sensor value. So, for a 50mm lens on a 1.6x crop sensor, it becomes an 80mm lens, and thus requires 1/80s or faster, and so on. Anything less and it's all you.
The shot of Chris Caffery above so demonstrates. At ISO 1000 it's plenty of light, (in fact its too hot), and at 1/80th it's too slow for a lens of 135mm and the motion is blurred. If I had shot this at 1/160th I could have froze the image, (and maybe underexposed it a little to avoid that hot spot on the right side of his face). The same issue also applies for zooming. Zoom the lens way out, up goes the need for speed.
The shot above demonstrates proper shutter speed. The ISO is also correct at 500. At 1/160s the shutter is faster than the focal length of the lens and the image is properly frozen. Ah, but what if the subject is moving? Does that not add up, thus requiring an even faster shutter speed? In a word, yes.
Above is another example with a zoom lens, the relatively cheap EF28-135mm kit lens. ISO 800 is proper for this 'slow' lens, as it's range is from f3.5 to 5.6 and that is regulated by zooming, (the more I zoom, the more the aperture closes down). So when I stick this lens on, I set the ISO to 800. Anyway, here Alex Skolnick is shredding and head banging, and at 1/400th of second, I was able to freeze his hair perfectly. 1/125th of second to counter my motion, and the additional speed to freeze his. It would be easier to get physically closer with a shorter lens than stand way back with a long zoom. Which is why many good shots are taken within the first ten rows from the stage. Furthermore, it's also a good idea to stick with short primes as they are generally faster and sharper than zooms. Shutter Priority (Tv). If your camera has it, and you don't want to fuss with other settings, then use shutter priority. With shutter priority (Tv), you set the shutter speed to something that will freeze motion, and the camera should adjust the aperature, ISO and sometimes gain, in order to receive a correct exposure at that shutter speed. What speed you use depends on the lens focal length and we'll discuss that further down. One last item regarding point and shoot cameras. These typically have much smaller sensors, and so the zoom range marked on their lenses might not be given in 35mm equivalents. That is, you'll need to know the actual 35mm equivalent zoom range of your camera, to then know you actual minimum shutter speed. This might be listed in your users manual, or just google it. Ok, with indoor photography, I need a wide aperture, and I also need a fast shutter to freeze motion. However, it's very hard to have both work together as each one can cancel the other out. What if you have to really crank up the shutter speed to freeze a jumping rocker, and don't have enough light to expose the shot? Something's gotta give, and that's where the ISO value comes in. The ISO value refers to the sensitivity of your sensor (or the film speed). If you've ever shot with film, then you may remember having to purchase 400 or higher ISO rated film speed. (Note: The term "speed" is technically not applicable as it would be better to say "sensitivity". More photo jargon to keep things interesting). Higher IS0 films are more sensitive to light, but at a cost of larger grain and loss of resolution. The same can be said for digital sensors. Turning up a sensor to increase its light gathering ability, heats it up and introduces noise into the image, and thus, there a loss of resolution (meaning details). Not all is lost however, as a noisy or large grained image will have more "perceived sharpness" than a noise free or tightly grained blurry image. It's all in the details. Therefore, in regards to using ISO 400, you increase your light gathering ability four-fold, and that allows you to maintain the motion stopping shutter speeds you need without being left in the dark.
The above example with Steve Broderick illustrates too low an ISO value. Here I was switching lenses from a 50mm prime to the 28-135, and he did this. Having no time to up the ISO, I turned down the shutter speed dial to the lowest I could go for the lens, 1/100s at 90mm and just fired. In post I had to crank up the exposure to the point of noise and had to kill the color channels to preserve contrast. Still a cool shot. Time for application. So you're still here? Ok. lets get busy. Ok, let's sum this up into some real numbers for you. You want to start with the following: Turn the flash off. ISO speed of 400 or more. Aperture at it's widest (numerically smallest) setting. f2.8 or 3.5. A minimum shutter speed at least equal to or a step faster than the focal length of your lens. Turn on image stabilization if you have. Set your camera to fast burst or continuous shooting. Pixels are cheaper than film. The first shot will likely pick up movement from your finger pressing the button, with the second shot hitting target, and a third or fourth might be just work better. Set your camera to use the center focus point only. Otherwise it'll focus on the brightest item in the frame, and that's not always your subject. If the object is even a few feet behind, the subject will fall out of the DOF (depth of field or things in that will be focus range). Set your sensors sampling to spot mode. You only want to be concerned with the exposure of the subjects skin, and by using the center focus point, you can force the camera to only sample that zone. Learn to focus and reframe. When using spot mode/center focus point, you'll have to first sample the subjects skin by placing the center focus point on the subjects face, press the shutter button half way so it reads and locks the cameras meter, but does not fire the shutter, and while keeping the button half-way depressed, recompose (frame) the shot and fully press the shutter. Note: In many cases the subject matter will be too quick to use the method of recomposing. Therefore, just center the subject, making sure you leave some room to do creative cropping post. Shoot RAW. This cannot be overstated. If your serious and your camera is capable of shooting in RAW format, then avoid jpeg captures. RAW is the digital equivalent of film negative. By capturing jpegs your throwing away valuable information and letting your camera decide the final result. RAW, like a negative needs to be post processed. If your camera shoots RAW, it most likely came with RAW conversion software. Use it. Here you will decide how to process the data into the final jpeg, (I use lightroom, others use Capture One or Apples Aperture). The Steve Broderick example in the ISO section above was done in RAW, and as a jpeg, I would not have been able to "push process" the image and recover a useable shot. Shutter, aperture, or iso? Which is first? It's a fairly common question. In my experience I always think shutter first. I need a shutter speed that's fast enough to freeze the motion. Then I need to ensure I have adequate lighting to expose the shot at my given shutter speed, which comes via aperature and iso. I then ride the shutter speed via the speed dial for individual shots. If it suddently becomes too bright, I can speed up the shutter to keep from getting over-exposed. However, it becomes too dark and I have to dial the shutter speed down to a point that I risk blurry shots. I then switch to opening up the aperature to let in more light. If however, it's really dark and the lens is already wide open, it's now time to crank up the ISO. Make sense? The reason I save ISO for last, is due to introducing noise and because it's a usually accessible only by menu (on consumer cameras), it's the slowest setting to make. Therefore, you should pre-set the iso to a baseline that will provide a decent range for your shutter speed. For indoor events, and lighted stages, you might want to try ISO 400 or 500, and set the aperture to f2.8-4 to see if that allows for a decent motion stopping shutter speed, (remember, unless you have IS, you'll need to factor in the lens focal length as the bare minimum, and consider the subjects motion). A few test shots will let you know what works. If your ok with noisy images and don't want large prints, or intend to post online (which can be very forgiving), then set for an ISO of 800 or 1000 and leave it, and then ride that shutter speed dial. In this business content is king and getting the shot is what matters.
Side note: cameras are getting better, and sensors are improving. My 40D produces useable images at ISO800. However, the new 7D goes to ISO6400, and that camera at ISO1600 has images that compare to my 40D at 800. Therefore, it's twice as bright.
(By the way, I did buy a couple 7D's. Ok back to the tutorial). Get close. That is, you want your talent or subject matter to fill at least 3/4 of the frame. Having more pixels covering your subject will ensure you have a sharper and more detailed image that will not be significantly degraded by ISO robbing noise.
When shooting your subject, if he or she is stationary, then you lower the iso and and slow down the shutter speed to just above hand shake to create a noise free image. If the subject is moving about, then you need to crank the shutter speed up to freeze that motion, and will have to crank up the ISO in order to get proper exposure.
Above, Jay Pierce pauses, an example of when it's ok to use a slow shutter to avoid high ISO noise. You always wonder why pros post such professional results. Well, we have to wack through a ton of shots to get a good one, and only post just that one. My current hit ration is about 3 to 1, (I get one keeper for every three). My long time average is about 10 to 1. I only know that because in the last year and half I've run over 90,000 actuations on my 40D, and have about 10,500 keepers in the database. Like Babe Ruth is a prolific hitter, I am a prolific shooter, and only pay attention to the home runs. Keep your camera at the ready and shoot anything that moves with good light. Check your shots. Many pros call it "chimping", and a sign of amateurish behavior. I say BS. If the feature is there to review the shot, I'm gonna use it. Many times I will shoot, check and re shoot until I get one that covers a particular move. That's the real beauty of digital. You can't check your film on site. Just getting a good focused shot is only par for the course. Getting a shot with emotion is the hammer that rings peoples bells.
Sometimes I swear I think that the performers find me, or when they see me, we are instantly drawn into a co-operative objective: that ultimate selling media shot. It may freak you out when you first see them starring right at you and that's a good thing. A big lens, vest, and badge usually means a cover in the local paper or a rag. Get ready, cause they'll sometimes toss you a bone:
Things that sell an image to the audience: Horseplay and performers reacting with each other. Grandstanding. Making a point. The grand finale. Creative use of pyrotechnics, shadows and silhouettes. Expectations and Outcome. This is a final and an important thought. If you shoot in a dark venue, and you find yourself cranking up the ISO, or having to slow down the shutter speed to get proper exposure, you will discover that some shots will look great at 600 pixels online. But make for horrible prints at 8x10 or larger. It's all about expectations. This is where gear matters. Faster, sharper lenses, and better sensor technology will play a part, and only if combined with proper technique. I know this has been a long read, and that the only real way to get good is simply go out and learn from your own mistakes. Hopefully I've given you some ground work and food for thought. At the very least you understand the nature of the beast. Above all else, have fun and enjoy the show. About the author, Pete Ferling. He's this guy who holds expensive cameras and brags about his photos to anyone who will listen... |
|


