| Canon FD lenses on EOS bodies | ||
|---|---|---|
1. Introduction
|
 |
|
|
This report is two-fold; one is to cover FD lenses on EOS bodies in general, and two, to avoid redundant editorial by testing several FD lenses in a single report. It is general believed one cannot use FD lenses on EOS bodies. Statements like that when taken at face value are incorrect. There are many issues at stake, and we'll cover them in detail. As always, there's more to an image than just being tack sharp. ANY lens, when mastered correctly, is capable of creating great works. You just have to work with them for what they can do.
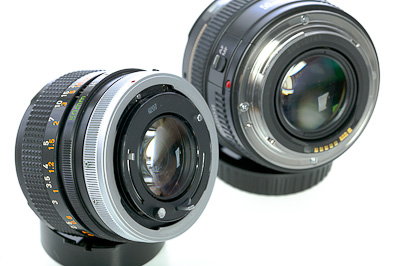
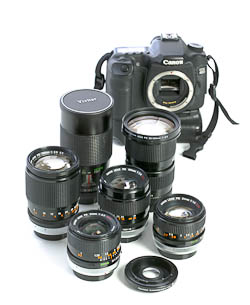
n 1987 and in an effort to produce an autofocus lens system Canon decided to scrap their old FD line of manual lenses and cameras for their new Electronic Optical System (EOS). This was quite a bold move as it essentially obsoleted some twenty-years worth of professional gear. While not an overnight issue, it meant that a new body required replaces ones lenses as well. Forntunately the current pro bodies at the time: the T90, F1 and FTBn’s were build like tanks (and many still work to this day), and film still ruled. On the other hand, if your competition made the switch, the advantage of an autofocus system meant more successful shots, especially in sports. Regarding the use of Canon FD lenses on EOS bodies there are generally two methods to address this: One is to retool and physically modify the lens, as done with my FD35 T/S, in which case, the modification becomes permanent. The other is to use an adaptor, with no tools or machining required, but at the expense of image quality by way of using an optic to achieve infinity focus. We are going to address the adaptor method here, its pros and cons, using various and most familiar FD lenses, and then comparing some of them to their modern EF equivalents: a 50mm f/1.4, 100mm f/2.8, 135mm f/2.5, and a 35-105mm f/3.5. Including a Vivitar 200mm f3.5 in FD mount just for kicks. All FD lenses, with exception of the tilt-shift, have an automatic aperture feature, wherein the aperture is closed down by the camera via a mechanical lever that is passed through the mount.
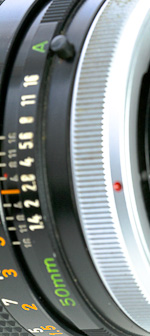
Older FL lenses have their apertures controlled directly by the barrel ring and required stop-down metering. FD lenses can also use stop down, but have to be connected to the camera body first. The act of twisting the lens bayonet throws a lever that completes the engagement of the aperture gear to the ring. The benefit of this system is that the lens is always open to its widest, and thus brightest setting for easy focus and framing. You simply turn the lens aperture ring to the desired setting (like you would with a preset lens), and the camera engages the stop down just prior to releasing the shutter. The FD lenses are also equipped with an automatic aperture setting, labeled as "A", used on FD bodies incorporating internal metering and TV, or shutter priority mode, to both preset and close down the aperture based on the meters reading of the scene.
3. Issues with using FD mounts on EOS bodies The FD system presents an extra challenge for the DSLR user. Since the lens needs to be mounted onto onto an FD camera in order to engage the aperture, Simply cutting off the arm to fit an EOS mount will not work, rendering the lens useless for anything other than wide open. It is possible for the most technical savvy to modify the lens, but not without significant machine work. Such methods are best reserved for the most rare or valued lenses in the line, as there are cheaper alternatives using M42 or other non-FD lenses.
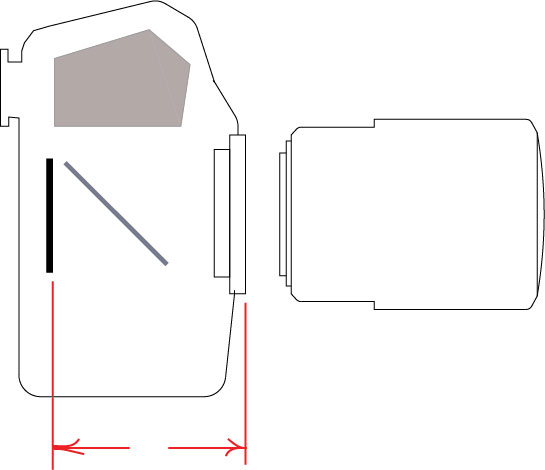
So, we are left with the second option: An adaptor. What's the real issue with FD lenses anyway? Well, canon designed the EOS line to have a film to focus distance of 44mm. Known as "Flange to focal distance ". This is the measured distance from the film (or sensor in a digital camera) to the back of the lens. That means any lens mounted on the EOS would need to have a matching flange distance in order to achieve infinity focus.
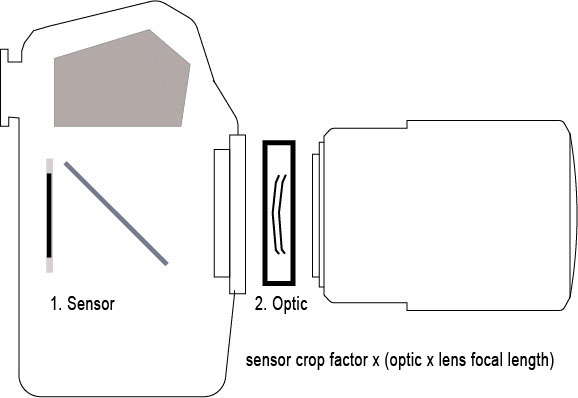
That's ok for lenses whose flange to focal distance is greater than 44mm, leaving physical room for an adaptor to make up for the difference in distance. For example, a Pentax M42 screw mount has a flange distance of 45.46mm, requiring an adaptor of 1.5 mm thick. Many are widely available and range from $10-25. However, with the FD flange to focal distance being 42mm (2mm less), you would have to sink the lens back 2mm into the EOS body. Even if you could fabricate an adaptor to do this, you'd still have to either lock up or file down the internal mirror, and lose use of the viewfinder . its not a very useful option. Therefore, you'll have to incorporate an optic into the adaptor to solve the issue with magnification. This adds a weak 1.4x multiplier to your lens distance. So a 50mm lens now effectively becomes a 70mm. But since we are also using a crop sensor camera, we'll have to add another 1.6x to that and our 50mm lens now becomes a 112mm lens.
1. When using a camera with a crop sensor, the sensor covers a smaller image circle and thus creates a magnified image. As a result, a lens whose markings are based on a 35mm sensor/or film has to be multiplied. 2. The optic of the EOS adaptor will also increase the focal length of the lens based on it’s magification. Thus 35mm focal length = crop factor x (adapt mag x lens focal length) For a 100mm lens on a Canon 40D, you get: 1.6(1.4x100)=224mm
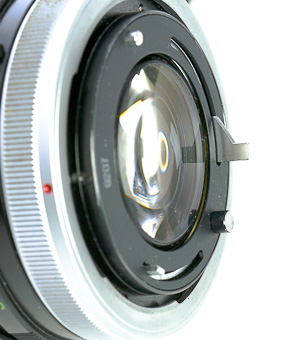
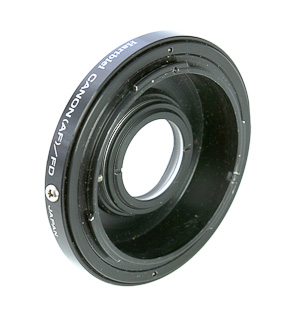
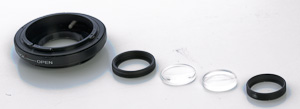
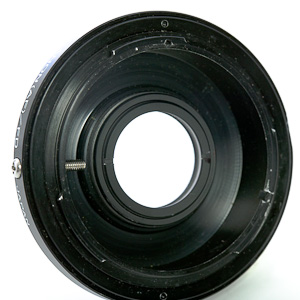
Canon did offer a 4-element adaptor at 1.26x for larger, more expensive telephoto lenses to ease the transition for professionals whom upgraded to the EOS bodies, and wished to keep their FD lenses. However, very few were made, and at $1000 ea. a luxury for many. Which brings us to another issue, and one of glass quality. Most included optics are not the best quality, if they are even coated at all, and they will change the lens' original formulation. Thus it's possible to introduce issues with ghosting, distortion and chromatic aberration. In short, you take away from the lens rather than add to it. Therefore, you might never really achieve true infinity focus as the image degradation will be enough to blur or distort small details anyway. One last consideration is that these optical adaptors need to be rather thick to accomodate the elements, and like a lens doubler, can rob a stop or more of light. So an f2 lens might become an f3, etc. 4. The Hartblei FD/EOS Adaptor There are several different kinds of adapters available on ebay, and I had the luck of getting a rather good one, a Hartblei with Hoya glass, (or as the seller claims it has. Hoya makes high quality glass filters). $38.00 Interestingly enough, by experimentation, the two element design has room to allow for adjustment to meet minor nuisances of achieving infinity focus on a lens by lens basis. I had to rotate it forward a bit and then use a small piece of putty to hold it in place) for correct adjustment.
Hartblie adaptor with 2 elements. Another important feature of the Hartblei adapter is a stop down pin that interfaces with the lenses aperture arm, and can be rotated to engage the aperture gear with the aperature ring.
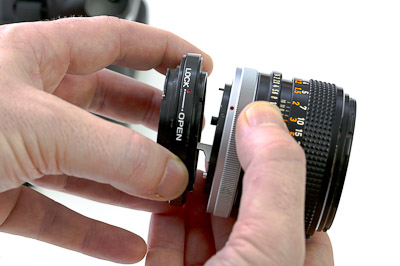
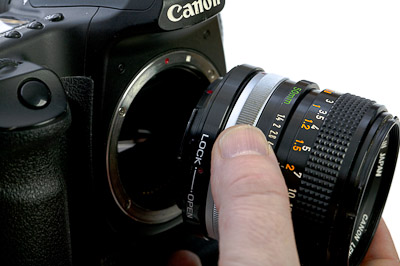
5. Initial settings and usage. Using the adaptor. Since FD bayonet mounts require some finesse to attach, it's best to attach the adaptor first. Then attach the assembly to the camera, and finally lock down the aperture
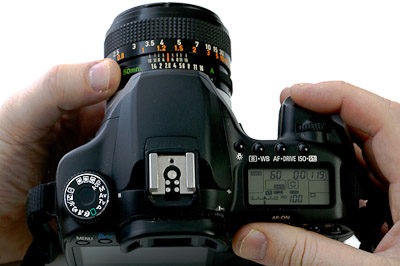
Setting your camera to Av (aperture priority) would be a good place to start. You can preset the aperture for your desired depth of field and let the camera pick a shutter speed based on the lighting condition of the scene. If the shutter speed is too slow, then you'll need to either open up the aperture, or move to a higher ISO setting. Remember to factor in your lens multiplied distance, that is your 50mm on a crop sensor camera is more like 112mm, so you'll need at least 1/125 for steady hand held shooting.
Something else to consider is the use of monopod, or very high ISO values for otherwise shorter lenses that normally would not require it. Keep that in mind in regards to ghosting and smear from movement. Finally, it comes down to this. Before I begin, I'd like to address issues with degraded resolution and sharpness. All of my outdoor shots were done hand held, so some image degradation is a result of camera shake, as many of these lenses will behave more like telephoto and require either higher ISO settings, or a monopod/tripod. That said, to be fair, I also performed a brief test in the studio comparing the FD lenses with their EF cousins, unedited. I can say without reservation that these particular FD lenses on this adaptor will not be an issue with regards to resolution and sharpness. Please also note both the change in focal length and brightness, as I kept the tripod in the same location. Validating both the increase in magnification of the adaptor, and the loss of 1 stop in lighting. (Now on to the individual lenses): |
||
|
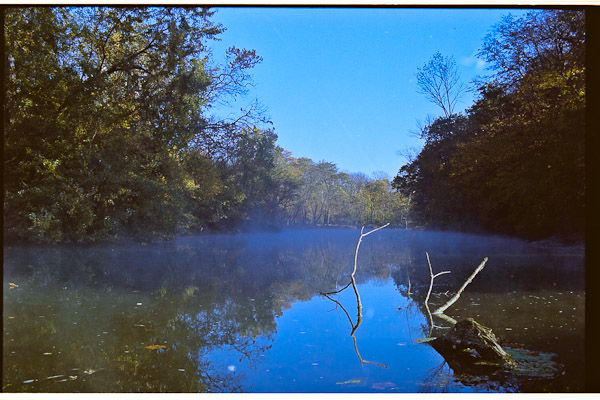
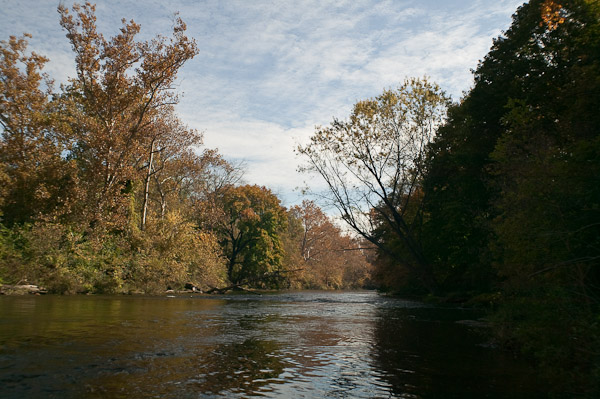
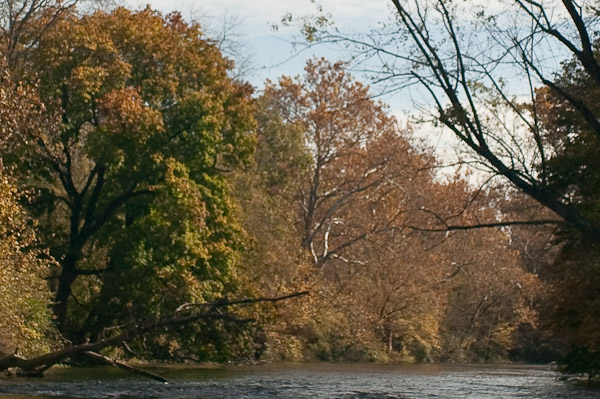
Specs: I initially thought that infinity focus was not possible on this lens, and that image quality would suffer to the point of losing fine details. After some adjustment and further testing, I find this lens quite useable on the adaptor. To illustrate, I've included two shots (including 100% crops) from this lens, one is with a scanned film negative (on tripod at f8), and the other digital (handheld at f8):
I would have assumed that handheld some quality loss is expected, and would not be a fair comparison with a tripod mounted film shot. However, I was pleasantly surprised to see how close the results were. Still, there are many other lenses in both M42 or Olypus OM mounts than can be used with pure mechanic adaptors not requiring optics, (see my Oly 28mm f/3.5 for instance), that would best meet the needs of finite details for landscape work. You would also avoid the extra 1.4x multiplier as well, as our 24mm lens is now 54mm -a normal lens. |
||
|
Specs:
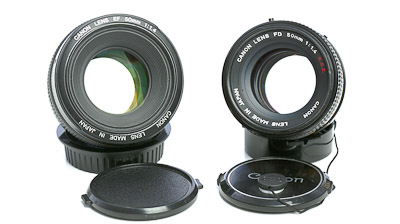
These two lenses are very similiar and I'm going to elaborate on them both as a good comparison between EF and FD models . "Two peas in a pod" That essentially describes the similarities between the Canon FD and EF 50mm f/1.4. Both are of the same lens design and formulation. The EF version has a built in autofocus motor, and thus the body is larger to accommodate. However, the FD has both a more solid build and smooth focus, while the EF is plastic and frankly, sloppy in comparison. Body differences aside, the glass is what really matters, and the EF is a worthwhile addition to any serious photographers kit, and is the fastest lens in the EF lineup. Both can be rather soft at f/1.4, which can be a lifesaver for at least getting the shot for indoors or dark situations. It's a good bar room lens, and a favorite of mine when shooting in concerts and events without flash, (you want to avoid flash when capturing candid's, or subjects unawares). The EF model, when on a 1.6x crop sensor camera becomes a great portrait lens at 80mm. While the FD with adaptor goes to 112mm. Just short of 135mm long portrait range. With the adaptor, the FD will lose a stop of light, hitting around f2, which is still very good for low lighting. The lens is multicoated with canons Super Spectra Coating, S.S.C., reserved for the higher quality lens line, and handles flare quite well. Both lenses front elements are somewhat recessed which helps when not using a hood. However, EF models front element assembly carriage is very delicate and can be damaged easily. Never set the lens face down, and be gentle when replacing the front cover. Now for a little direct comparison. The two images below represent identical conditions and camera settings, shot manually, and are unedited. Can you tell which one was shot with the EF and the one shot with FD?
|
||
|
Specs: My favorite lens, sharp with smooth focus. Not the macro, that version is f/4 and a little too dark for my needs, (I have the EF100 f2.8 macro for that- one of canons best). The EF set me back $680 new, and the FD here was $32.40.
|
||
|
Specs: I like this lens, it's a heavy piece of glass and the built in lens hood is handy. I also have an EF 135mm f/2L, considered one of the best DSLR lenses ever. $1400 new, used samples still fetch $800 or more on Ebay. My FD sample set me back $46.00. In using this lens I found it difficult to nail a tack sharp shot without either cranking up the ISO or bracing against something solid to steady. On the adaptor, it becomes a 302mm! A tripod or monopod is require gear for this. But when it hit the target, it's just as sharp as my EF, and even with the single coating (S.C. and not S.S.C), it handles colors and flare reasonably well.
|
||
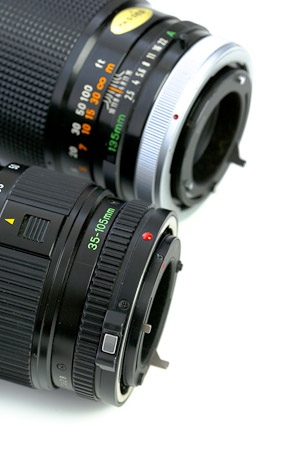
Canon Zoom FD 35-105mm f/3.5 Macro Specs: This lens is part of Canon's "New" FD lens line. Canon replaced the much complained about bayonet ring with an easy one handed twist lock device. A quick release button is also provided for removal. Also gone is the multi-coating designation, as all lenses are now multi-coated.
This particular lens is a favorite, both in usable range from wide to portrait, and sharpness. It's is my favorite general use or 'walk-around' film lens. Naturally I'd want to keep it for my EOS bodies. On the DSLR with adaptor it's range is now 78-235mm. That is also a very useful range, as many lenses are available for 70-200mm. This lens also sports a constant aperture of f3.5, so it's just as bright zoomed as it is wide open. With the adaptor it loses a stop of light, so it's 4.5, and still suitable for most applications. The only gripe I have with the lens is it's five-bladed aperture Which makes for so-so background blurs that have five points rather than circles. In regards to usage on the Hartblei adaptor, I can find no issues. Other than the extended range, images are comparable to what I get when shot on film cameras. A good value this one.
|
||
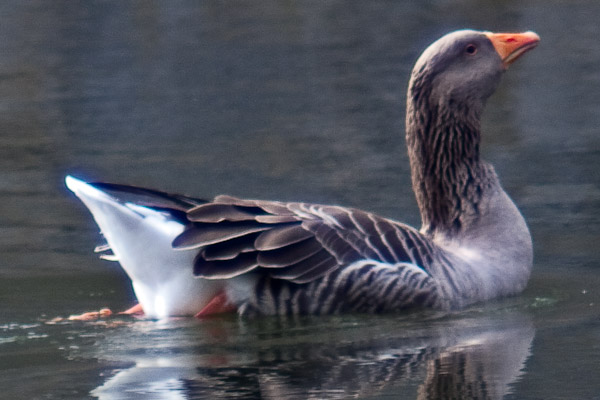
Vivitar 200mm f/3.5 in Canon FD Mount Mfg by Komine (s/n 28500906) This is a non-series 1 lens, according to the serial number "5" it's either 1975, or 1985. However, with a 62mm thread, I cannot find this lens in either the third party list nor the Vivitar Cult Classic site. It's a mystery, and yet I've seen one other on ebay just last week. There should be at least 905 more them out there. This particular lens is flawless Not a scratch nor even dust inside the elements, (it's found a home in a protective case). The fit, finish and feel of this lens is something to behold. Shooting with the adaptor is a mixed bag, and hand held at 200mm, it's actual distance is 448mm, I would have to be at roughly 1/500s for ISO100 and wide open. Unfortunately I was in a rush for time and neglected that fact. I have one shot of geese at ISO100, 1/400s, and as you can see by the 100% crop below, it wasn't enough to steady the shot.
Colors are good, however purple fringing is present. Mostly likely a result of the extra optic in the FD adaptor, (I will have to test that same lens model in an M42 mount). In a quick test in the studio today, (as you will see in the sample slide show) validated the sharpness of this lens when shot correctly. Next time I'll bring a monopod. |
||
|
As I've said from the beginning. ANY lens can make great images, so long as you understand it's limitations, and the kinds of imagery you are after. For example, sharp lenses with good coatings that produce accurate colors can do wonders for product photography. However, they can be too revealing and harsh for portraits (unless that's what you want), where not-so-sharp lenses and all their issues can create a more pleasing result. FD lenses can be used on DSLRs with success, so long as you consider their extended focal length and 1-stop loss of light via an optical adaptor. Which will require higher ISO values, higher shutter speeds and/or monopod or tripods to counter shake. In short, user error is also a factor. This issue became apparent when I shot with both the 135 and 200 handheld. Not all adaptors and their optics are the same, and your actual results may vary. Don't believe everything you read in public forums on the net. Many posters just repeat what they have already heard or read as the generally accepted answer. Always test and draw your own conclusions. So, the more important question is not can I use FD lenses on EOS bodies, (as we've proven that). But, should I go ahead and start using them in place of EF lenses? The answer in my opinion is "NO". There are similiarly priced (as in cheap) alternatives using M42, or Olympus OM lenses that can achieve infinity focus without an optic. However, if you already have an FD collection (as I do), and wish to experiment in light of the issues I've addressed, then by all means, go for it. I most likely will keep the 50 and 100mm lenses as these are the most tollerant, and give me the most keepers. I may decide to have the 135 f2.5 permanently modified as it's a gem to me, and very, very sharp with film. It also renders a unique look that I don't have in my collection, (which is the reason I'm doing this in first place). In closing, you cannot assume to use these lenses, or any other manual lens with the same finnesse and application of modern automatic lenses. Above all else, these lenses force you to slow down and think first. Remember that next time when you see someone passing through a scene, firing away with seemingly unlimited ammo, and not really stopping at all to appreciate what they just shot. Why do we take pictures in the first place? Thanks for reading. |
||


