Canon FL Bellows, an old dog that doesn't need to learn a new trick. |
|
|---|---|
Specs: |
 |
|
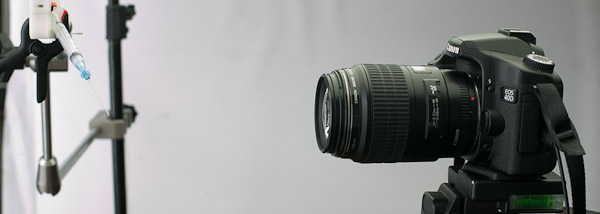
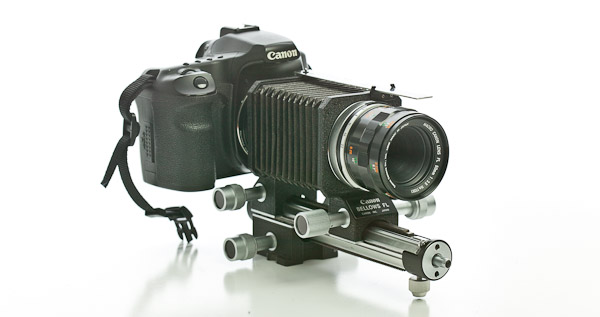
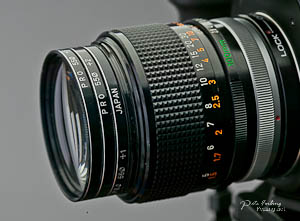
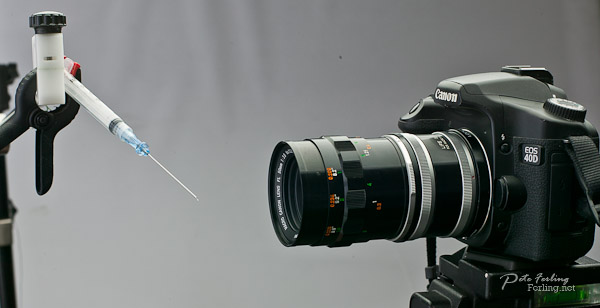
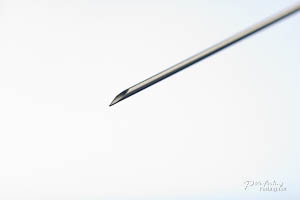
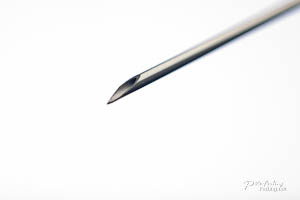
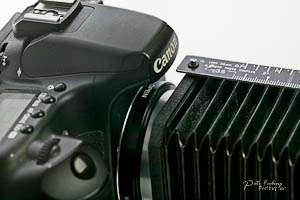
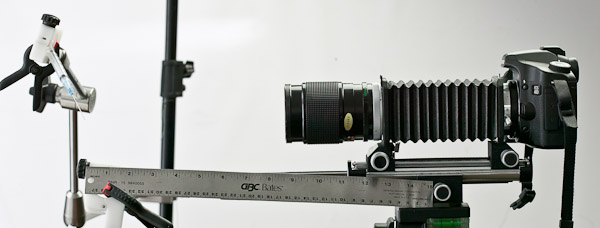
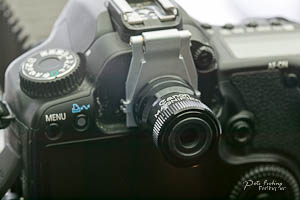
There are times when one needs to shoot small things, I mean really small, and reveal even smaller details. Such as the bevel of a sharpened needle, or a small knot in a suture not much larger than a human hair. Couple that will having a need to fill the whole frame for a sizeable print, and well, it's time to break out the big guns -including the bank, or is it? Canon's current offering is the MP-E 60mm f2.8. With it's 1-5x, it can get the job done. You also buy a jewelers scope with a camera attachment as well. However, there are much cheaper and believe it or not, more creative tools at hand. The Canon FL bellows, (shown below with a 40D), are nothing new, and when canon switched to the new EF mount, production ceased. However, the need for tight shots of really small objects is still a very real issue today, and while the MPE, at $1600 is an option. The bellows, $150 is much more attractive.
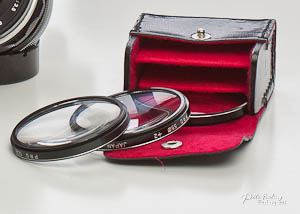
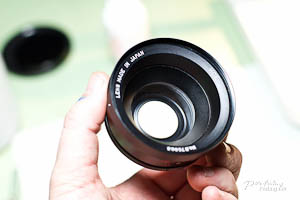
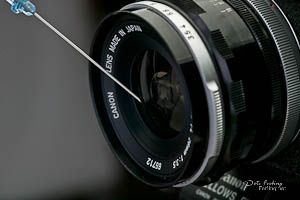
There are other cost effective solutions, and with varying degrees of result, such as using close-up lenses. These you can screw-on the lens, as shown below, and they are stackable, thus increasing the magnification factor.
However, the results are rather lacking as these tend to alter the lens' formula, increasing diffraction and chromatic aberration (CA, or purple fringing). Things you don't want as they tend to wipe out the finer details you need to begin with.
A similiar screw on device, but with more features is the Tiffen Vari-Close-Up lens.
It has two elements and a focusing helicoil and merits it's own review. Read it here. A well known alternative is to use metal extension tubes (or macro tubes) these, like the bellows, push the lens away from the film or sensor plane to increase the magnification.
However, they are not very convenient with regards to making micro adjustments and focus. Not to mention all those tubes one has to screw on and off in a hunt to find the right framing, (a seperate focusing rack would be great aide, which the bellows has built it).
Another trick is to use a lens reversal ring to basically mount the lens on backwards to the camera. This has the benefit of increasing magnification as the lens' barrel becomes it's own macro tube, and it also helps to limit diffraction. The drawback is that this makes any autofocus lens useless as it no longer communicates with the camera, which is required for the aperture to stop down. A manual lens would benefit. One other issue with mounting the lens backwards is the lack of proper focus, which cannot be done via the lens. That is, you have to turn the focus until the bottom group reaches it's lower limit, and then move the camera back and force to achieve focus. Even so, it's extra effort with little return when one is trying to get greater than 1:1 (life size) magnification. However, there's no reason why a reversal ring can't be used on the bellows, as the bellows will allow for precision focusing as it moves along it's rack:
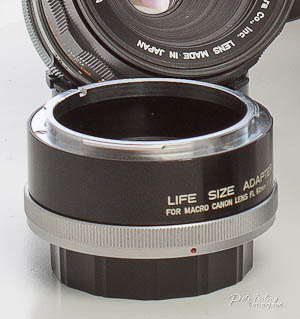
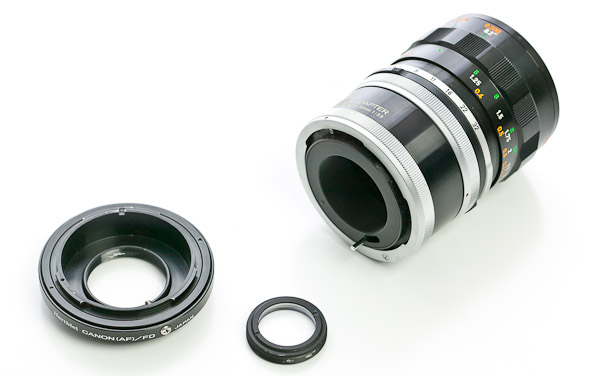
So, what does the bellows do? Well, it does all the above, and has one very important feature: very precise control over framing and focus. To give you an idea of what I mean by precise, imagine a depth of field so shallow that when you shift your weight, breath on the object, or even touch the tripod, it can make a difference between a sharp and not so sharp shot. Somewhere around .5mm is the wiggle room at 3x. Razor thin? Yes. The above might not matter to you with regards to the flying insect, a 5x7 print, or a post to the web. But when tasked with using all 10-20 megapixels (depending on your camera), and needing to make a six-foot poster! You get the idea, "Nobody breath!" Click. Now when dealing with this particular bellows, the Canon Macro FL Bellows, I found it to be a gem. Purchased at KEH.com for around $130, it looks practically new! In fact, you know the sound you get when you crack open a new factory pressed book? Yup, that's the sound I got when I first stretched out this bellows. Second point. Having an FL mount required an EF to FD adaptor (fortunately I have one), and if you've read my article regarding the use of FD lenses on EOS cameras, you would learn that these adaptors require a weak multiplier lens to correct the focal plane in order to establish infinity focus. That lens, just like the close-up lenses I spoke of above, can alter the host lens' formula and introduce detail robbing diffraction and CA. However, when using FD lenses for macro applications, infinity focus no longer matters. In this case, you can remove the glass multiplier from the adaptor. Thus all the original qualities of the well know FD glass are now at your disposal, unalterned.
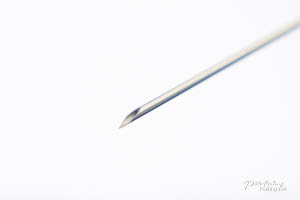
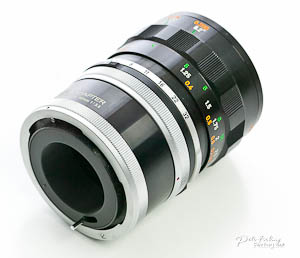
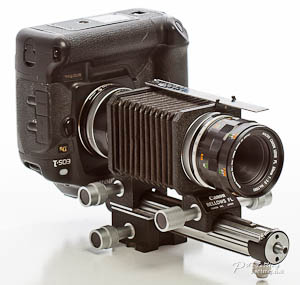
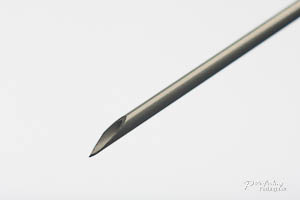
Third. While it's possible to use any lens on the bellows, you are actually limited to just a few lenses covering a range from 35mm to 100mm (for a 1.6x crop sensor camera). As the focal length of the lens decreases, the working distance from the lens to the object also descreases. We'll start with an FD135mm f2.5. A gem of a lens, regarded as one of Canon's best FD portrait lenses (only second to the legendary FD85 f1.2 L). Below, and fully extend on the bellows at 3x, we can see that there is plenty of working distance from the lens to the object, at around nine inches. However, the results tell us that it's no better than a stack of cheap closeup lenses!
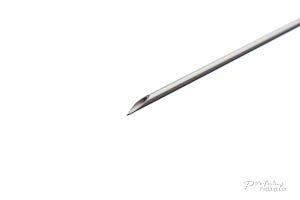
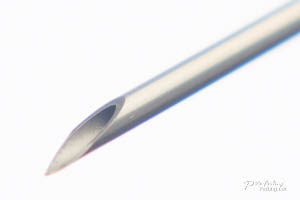
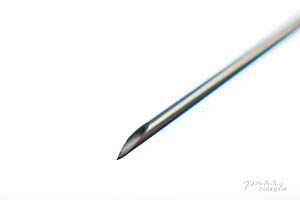
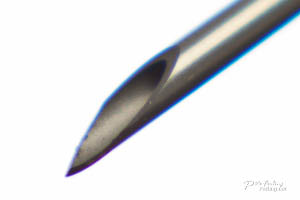
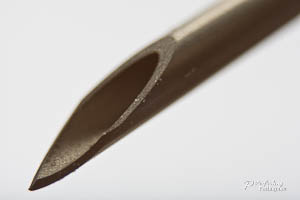
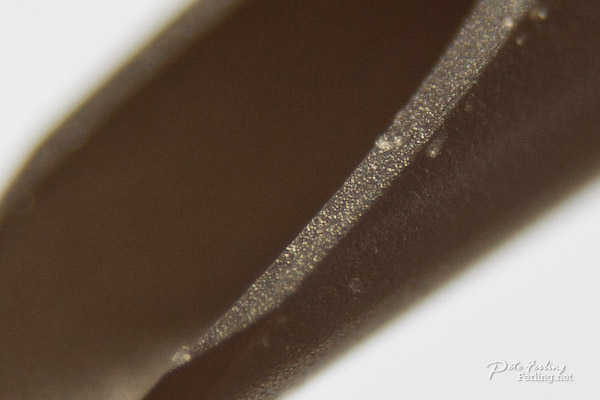
Now lets hit the other extreme, and when I mean hit, I mean "hit". When using a lens with a focal length of 35mm, it reduces the working distance to mere fractions of a inch, and one has to be carefull to avoid running the lens into the object! A costly mistake. While this lens, an FL35mm f3.5, at $30 is a bargain, in comparison to it's more expensive cousin, the 135 f2.5, it's renders an incredibly sharp and distortion free image! In fact, our sharp needle isn't looking sharp at all, resembling a crudely cut and severely pitted metal tube, (but trust me, it is - I was reminded once during this shoot).
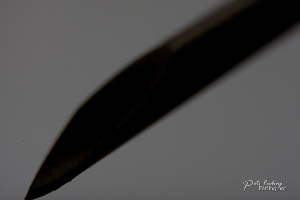
Fourth and final. One item we need cover and that is one of lighting. When adding tubes, bellows or such, you are also decreasing the amount of light that reaches the sensor. Below we have the 35mm f3.5 at 1:1, and 3:1 using the same level of lighting. Extending the bellows a few inches can make for drastic results.
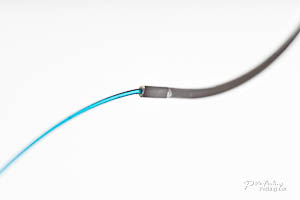
With regards to ISO 100, out goes hand-holding, and in comes the need for some really strong lights. While in the studio having 3200 w/s strobes can meet the challenge. In the field you need something more specific such as a macro strobe. A ring light that is fitted to the front of the lens to immerse the object. Now while you could just crank up the ISO, you risk introducing noise into your image and losing the finer details. Actually, I lied. There's a fifth issue. One of movement. At 3x magnification, the world becomes a scary and unstable place. Air circulating from the overhead ventilators, the heavy footsteps trodding nearby and even simply touching the shutter button will make your object or camera move several pixels in an instant and it's blurry city for anything less than 1/250th! Yes, it if shows up at 100% magnification on the monitor, it will show up on your prints. Below is a 6-0 suture and line, about 3-times the width of a human hair. The first shot on the right was a perfect match as the entire sutures profile fit within the DOF plane. It took several patient tries on that one, and nearly impossible hand-held. The second shot, left, is of the same suture, but rotated a few millimeters. Notice how quickly both ends fall out of the focal plane.
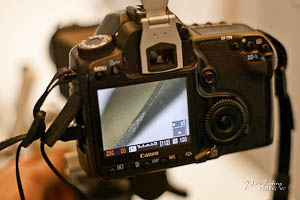
Now would be a good time to learn about using mirror lockup to prevent unwanted vibration from the mirror slapping during the shot. Using mirror lockup also allow you use "live view" if your camera has it, like the 40D in the test, and use full magnification to find the precise focus. If you don't have live view, or wish to use the viewfinder, a magnifier might help. In some cases, with reqards to fragile or very light objects that move in relation to the influence of air circulation, etc. You may have to ride the focus knob while taking the shot. Of course, one should use a sturdy tripod and either a remote switch or set their shutter to timer to avoid camera shake, (from you pressing the shutter release) showing up in the shot. Lastly, if you have image stabilization (IS) and your using a tripod, turn it off. In such cases, IS may actualy blur the shot. Macro photography will enhance and magnify every detail of a given scene, including lens issues and movements. Before I close, I should mention that there are software solutions, known for focal field stitching, where one would take several shots of the same object in varying levels of focus, and the software uses the sharpest parts of each image to create a single sharp image. (Helicon focus being one such program that I am currently playing with). While such software is useful in regards to improving the end result. It can only work with what you've acquired in the first place. Garbage in, garbage out. I hope you've learned something from my experience, and for once, something of actual benefit outside of simple curiosity. It's true that an old dog that doesn't need to learn a new trick. Keep shooting.
|
|